Clients and friends often ask me what to do with an old computer and how to make sure data on their old machine doesn’t fall into the wrong hands when donating or recycling. Below are instructions for how to permanently erase ALL personal data stored on the hard drive.
Important: When a drive is “erased”, the data is NOT actually removed. Many “erase” or “format” procedures only delete the drive’s *directory* – the place on the drive which tells the computer where the actual files are stored. Unless you specifically tell the erase utility to write new data (usually zeros) to the entire disk surface, data may remain on the drive and could be recoverable by the technically inclined.
Disclaimer: Be careful here – you’re about to ERASE data, PERMANENTLY. Make triple sure you’re selecting the right drive to erase and when in doubt STOP. If necessary, make a backup of the data to another drive before proceeding. Data WILL BE PERMANENTLY erased using the steps below. Proceed at your own risk…
Method 1: Boot from the Recovery Partition and Erase
1: Turn on your Mac and immediately press and hold Command (⌘)-R. Release the keys when you see an Apple logo, spinning globe, or other startup screen.
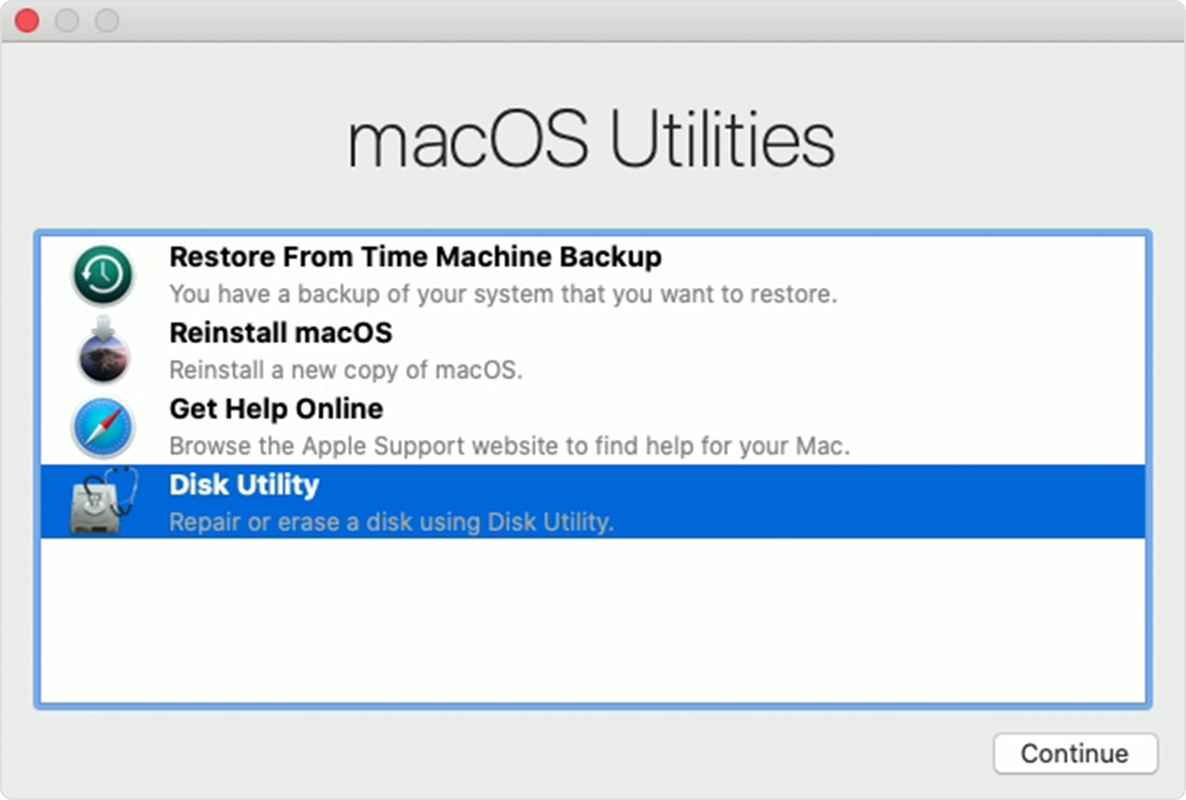
2: Choose “Disk Utility” from the Utilities window and press “Continue”:

3: When Disk Utility launches, choose “Show All Devices” from the pop-up menu on the upper left:
4: Select “Macintosh HD” (unless you renamed the hard drive – in that case, select the name of your internal drive) from the list of devices in the left column.
5: Click the “Erase” icon in the upper center of the Disk Utility window, then click the “Security Options…” button on the lower left:
Note: if the drive you’re erasing is an SSD (solid state drive), the “Security Options…” button won’t appear. Skip to step #7.
6: Slide the Security Options slider one notch to the right, so Disk Utility will write zeros across the entire drive, therefore rendering the data unrecoverable:
7: Click OK and then click “Erase”.
Depending on the size of the internal drive, it can take many hours to complete a pass of writing zeros to every sector on the disk. Longer if the disk isn’t healthy and is in the process of failing.
8: When the process is complete, quit Disk Utility.
Optional: If you plan to pass the machine to another user, install the operating system by clicking the “Reinstall macOS” button. Otherwise the Mac won’t be able to boot.
9. When everything is finished, choose “Shut Down” from the Apple menu in the upper left corner of the screen.
Method 2: FireWire Target Disk Mode
With the proper cabling, you can mount the hard drive of an old computer on the Desktop of a new(er) computer and use Disk Utility to erase the drive of the old computer.
1.Shut down your old computer completely.
2.Restart your old computer while holding down the T key on the keyboard. You should see a floating FireWire or Thunderbolt icon on the screen.
3.Connect a FireWire or Thunderbolt cable between the old machine and another computer. The old drive’s icon should mount on the Desktop.
4.Open Disk Utility (Applications: Utilities: Disk Utility).
BE VERY CAREFUL – the internal drives of both machines are likely to be named “Macintosh HD”. Make sure you’re selecting the FireWire or Thunderbolt target disk of the OLD Mac when erasing!!!
5.Follow steps 3 through 8 above.
Pros: This method can be used in situations where a bootable OS X recovery disk isn’t installed or the old machine won’t boot from it.
See http://support.apple.com/kb/HT1661 for more information on use of FireWire/Thunderbolt Target Disk mode.
Kirk van Druten – LANSharks Consulting
510-601-5475